
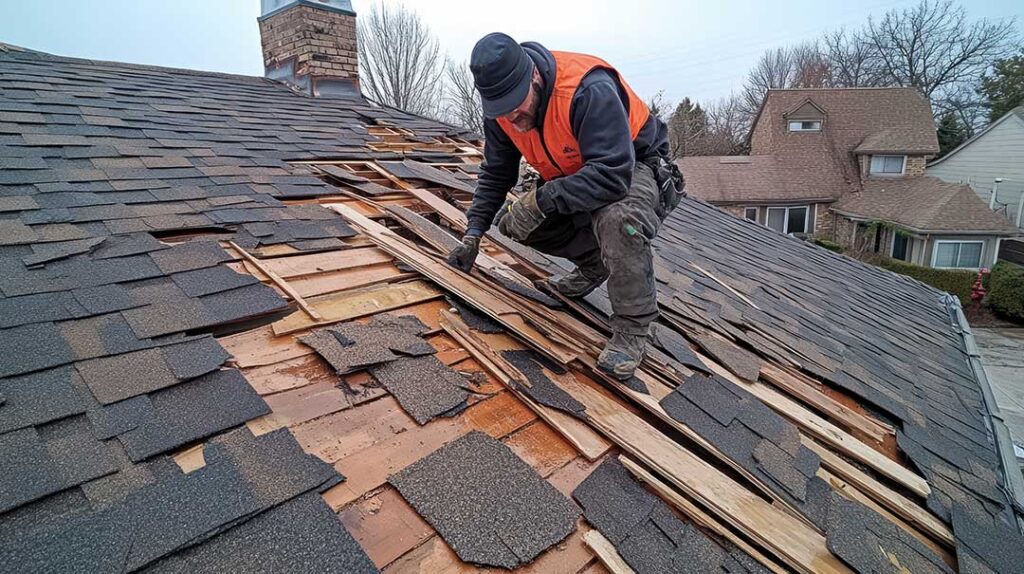
Roof flashing is a water-shedding material installed at the places where a roof changes direction, meets another building surface, or is interrupted by an opening. It may be made from metal, flexible membrane, or a combination of materials.
Its purpose is straightforward: guide water away from vulnerable joints and back onto the roof surface or exterior drainage path. Shingles, underlayment, siding, and sealants all have roles, but flashing is the component that helps manage water at the most complicated parts of the roof.
Why does roof flashing matter?
Flashing helps prevent rain, melting snow, and wind-driven moisture from entering the roof or wall assembly. Without properly installed flashing, water can travel behind shingles or siding and remain hidden for a long time.
A small flashing failure may eventually contribute to:
- Rotting roof sheathing or wall framing
- Stained ceilings and interior walls
- Damp insulation
- Peeling paint or damaged plaster
- Mold growth in persistently wet areas
- Corrosion around fasteners and metal components
- Ice-related leakage during winter weather
The damage does not always appear directly below the original problem. Water can move along rafters, sheathing, insulation, and framing before becoming visible indoors.
Where is flashing installed on a roof?
Flashing is generally found wherever water could collect, change direction, or enter through a roof opening. Common locations include roof valleys, chimneys, plumbing vent pipes, skylights, dormers, roof-to-wall intersections, and roof edges.
Roof valleys
A valley is formed where two sloping roof sections meet. Water from both surfaces flows toward this channel, making the area especially vulnerable to leakage.
Valley flashing may be visible as metal between shingle sections, or it may be covered by roofing materials and a waterproof membrane. Leaves, pine needles, and ice can obstruct drainage in valleys, increasing the pressure on the flashing and surrounding shingles.
Chimneys and masonry
Chimneys require several coordinated flashing components. Step flashing is installed along the sides, while headwall or apron flashing helps protect the upper edge. Counterflashing is commonly built into or attached to the masonry and overlaps the lower flashing.
Mortar joints can deteriorate over time, and improperly placed sealant may hide rather than solve a flashing problem. A chimney leak may appear as a ceiling stain near the chimney, but the actual entry point may be higher on the roof.
Plumbing vents and other penetrations
Pipes that pass through the roof use flashing boots or similar assemblies. These include a base that sits beneath or among the shingles and a collar that fits around the pipe.
Rubber components can become brittle, split, or shrink with age. Metal collars may also loosen or corrode. Because vent flashing is relatively small, a failure can be easy to overlook during a casual ground-level inspection.
Roof-to-wall intersections
Where a sloped roof meets a vertical wall, water can run toward the joint and enter behind siding or trim. Step flashing is typically installed in sections that overlap as the roof rises. Kick-out flashing at the lower end helps direct water away from the wall rather than allowing it to run behind siding.
This detail is particularly relevant on homes with additions, dormers, enclosed porches, and other changes in roof shape.
Skylights, dormers, and roof edges
Skylights and dormers create several intersections that must be integrated with the surrounding roofing materials. Flashing should work with the roof underlayment and shingles rather than relying only on exposed caulk.
At the lower edges of roofs, drip edge flashing helps direct water away from the fascia and into the gutter area. It also helps protect the edge of the roof deck from repeated wetting.
What materials are used for flashing?
Metal flashing may be made from galvanized steel, aluminum, copper, stainless steel, or other corrosion-resistant materials. Flexible flashing membranes are also used around penetrations, valleys, walls, and areas where movement makes rigid metal difficult to install.
The right material depends on the roof covering, surrounding siding or masonry, exposure to water, expected movement, and compatibility with other metals. Incompatible materials can accelerate corrosion. For example, certain combinations of dissimilar metals may react when exposed to moisture.
Flashing should also be installed so that water flows over, rather than behind, the layers below it. This is why sequencing matters. Upper materials generally need to overlap lower materials in a shingle-like arrangement.
How do Troy’s seasons affect roof flashing?
Troy experiences cold winters, snow, ice, rain, and repeated freeze-thaw cycles. These conditions place stress on roof details even when the main field of shingles appears to be in reasonable condition.
Snow and ice can remain around chimneys, valleys, wall intersections, and roof edges. When temperatures rise, meltwater may move beneath snow or refreeze near colder roof edges. This can expose weak flashing details that may not leak during ordinary rainfall.
Summer heat also causes roofing materials to expand, while colder temperatures cause them to contract. Over many seasons, movement can loosen fasteners, open seams, crack sealants, or fatigue flexible components.
Older homes and homes with several roof additions may have a greater number of flashing transitions. Each transition is a place where installation quality, age, and seasonal movement can affect water management.
What are signs of flashing failure?
Some warning signs are visible from the ground or attic, although a complete evaluation may require closer inspection.
Look for:
- Water stains on ceilings or upper walls
- Damp or discolored attic sheathing
- Rusted metal around roof penetrations
- Missing, bent, or lifted pieces of metal
- Cracked sealant near chimneys or vents
- Loose siding near a roof intersection
- Soft wood or peeling paint around eaves
- Shingles that appear raised near valleys or wall lines
- Drips or dampness after rain or snowmelt
A stain that appears only during wind-driven rain may point to a flashing or roof-edge problem rather than a general failure of the entire roof.
Can roof flashing be repaired without replacing the roof?
Sometimes. If the surrounding shingles and roof materials remain serviceable, a localized flashing repair may be possible. The repair may involve replacing a vent boot, rebuilding step flashing, improving a valley detail, or correcting the connection between flashing and siding.
However, covering old flashing with more caulk is not always a durable repair. Sealant can shrink, crack, and separate from surfaces. Flashing that is badly corroded, incorrectly layered, or trapped behind other materials may need to be removed and rebuilt.
The condition of the roof covering matters as well. If shingles are brittle or breaking apart, removing them to reach flashing can cause additional damage. A repair decision should account for both the flashing and the materials that surround it.
What should homeowners check safely?
A ground-level inspection can identify obvious concerns without walking on the roof. Binoculars may help with viewing roof edges, valleys, chimneys, and vent areas. Inside the attic, check for damp insulation, darkened wood, rusted nails, or daylight where the roof assembly should be sealed.
Avoid climbing onto a wet, icy, steep, or fragile roof. Roof surfaces can be hazardous even when they look dry from the ground. If flashing is located near a chimney, electrical equipment, or a steep roof edge, closer inspection may present unnecessary risk.
Roof flashing is not decorative trim. It is part of the drainage system that protects the roof, walls, insulation, and interior finishes. In a climate with snow, rain, and frequent temperature changes, well-integrated flashing can make the difference between water being directed safely outside and moisture becoming a hidden building problem.
